The brake set up I have run the last 2 summers is stock
96 Miata with Hawk HP+ pads. It was without
a doubt the worst brakes I have ever experienced in any car I have owned!
So time for a change! But of course I could not
just go spend 1500 bucks on a proper big brake kit. Way to easy and dull. So I spent way too many hours learning about hydraulic piston surface area
and analyzing specs such as rotor offset, thickness and weight just to name a
few and came up with this plan:
Old front rotor 254mm (10”) going to a 2000 Corvette 325mm (12.8”) rotor - yeah that's BIG!
Old single piston front caliper with a piston area of
3.14” going to 2000 Camaro two piston caliper with a total piston area of 4.70”
Old front rotor 254mm (10”) going to a 2000 Corvette 325mm (12.8”) rotor - yeah that's BIG!
Old rear rotor non vented 251mm (9.9”) going to 07 Mini Cooper vented 294mm (11.6”) rotor.
Old single piston caliper with a piston area of 1.22” going to 1995 Camaro single piston caliper with a piston area of 1.95”
Old master cylinder bore 7/8” going to 1996 Explorer 1 1/8” bore
Adjustable purporting valve is already installed on the car.
I fought long and hard not to redrill rotors but there
was just no other way to get the right offset for the car and thickness for the
calipers.

I started with the back and came up with a simple yet efficient
design to hang the calipers. .

 It's hard to tell what is going on here but it's 2 pieces of 1/8th inch plate with the spindle sandwiched inbetween them and the caliper bolted to them as well.
(Note the nut is loose and the bottom bolt just
catching the first threads because everything is finger tight or less in these
shots)
And now you see why I chose the 95 Camaro caliper. The parking brake cable on that caliper is
the same set up as the stock Miata and it works perfect! 

The Miata calipers were the same way it's just that area was not machined. This is the new rear rotors
compared to the old ones.


The way the spindle is I
should have used a larger rotor and it would have made things much easier. So the top is spaced back much farther than
the bottom and the caliper is rotated rearward which is the only way I make
room for the bolts to clear each other. It's probably not the ideal caliper
position but so far it has worked fine. 

And assembled just to see it...

Just like last time bleeding this car proved to be most
difficult and I had to reverse bleed it from the bottom up.


Even this didn't get it all and I ended up making a
DIY pressure bleeder too out of a hunk of PVC pipe that worked great.
While I had her torn down I also replaced all the
suspension bushings with polyurethane and rebuilt the front sway bar links with
heim joints so I had to align it before I could road test anything.

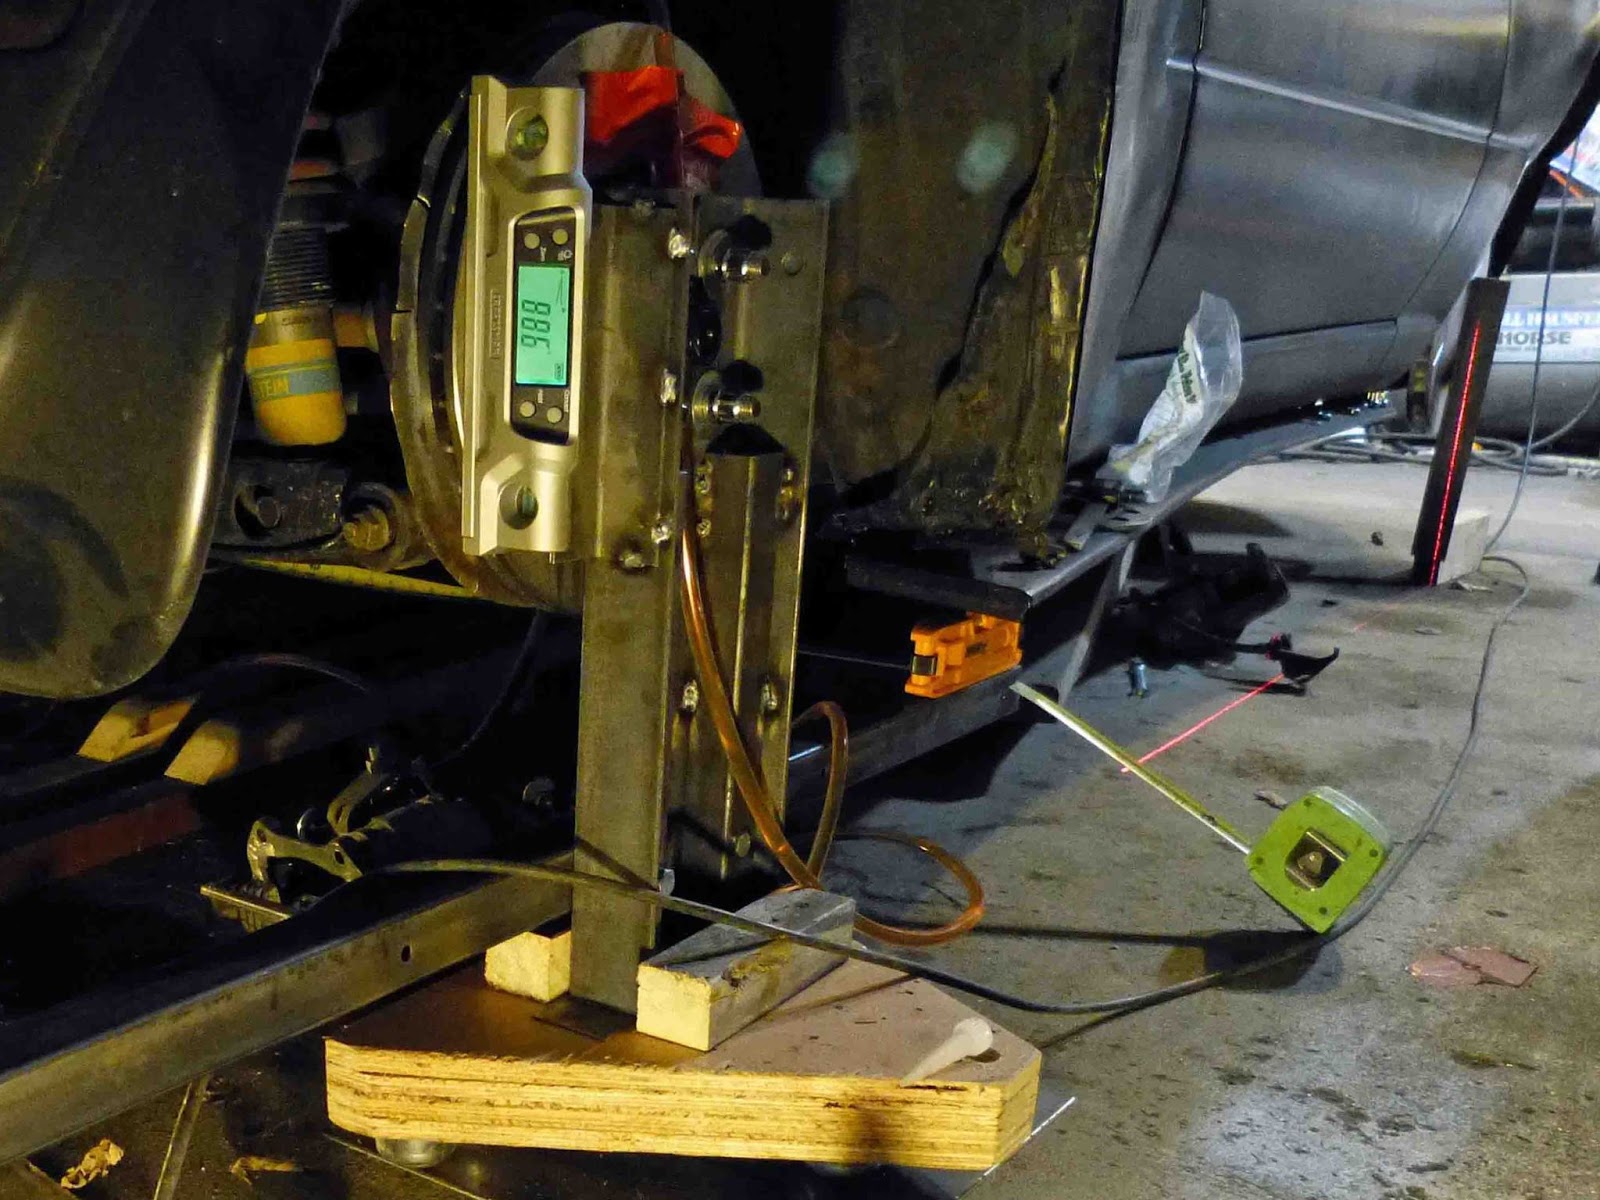
DIY of course!
Results? Before and after shots here and they
did fill up the big wheels like I wanted them too.


But more important is I did a shake down at an autocross and though they performed flawlessly. The pedal feel is much improved and the on tear down I could see no evidence of my brackets being stressed. So it was off to the track.

I need to do some work on cooling for sure but wow do these brakes haul it down from 140 to 60 with ease. They really dig in and seem to have no limit to the stopping power
And the tally?? Oh yeah it's a good one
20ish hours of research,31 hours of fabricating and wrenching
Sold the stock brakes for 100 bucks
$314.53 in parts
Bottom line $214.53 and really good brakes!
So now she's back in the shop working on brake cooling..

and replacing a CV joint that cooked and broke at
the track.


It was caused by the exhaust running just below it
with no shielding to it. Over the years the grease dried out of it and
it's been going bad for along time. Don't know why I couldn't tell but I
couldn't!
Sadly it cut my weekend short and put her on the trailer
home from the track.

So until next time I hope you are walking with Christ and
living in the joy of what He has done for us!
