For a quick overview video of the process start to finish CLICK ME.

For the detailed story starting at the beginning CLICK ME.

You can click on any photo in the blog to make it bigger.
Showing posts with label Important Posts for Builders. Show all posts

Thursday, May 1, 2014

V8 Miata Cooling upgrade and other little stuff.

The flare sculpting is progressing slooooowly. Like all new things it is one step forward and 2 back as I keep trying to get things looking good and symmetrical 
Or in this case wipe on, sand off, wipe on, sand off, repeat....  I've used about 2 gallons of fiberglass so far and as you can see about half of it has been turned into dust!  I have a short video update I made a couple of weeks ago if you want to see it HERE 
 
More on that to come but this post is to update on the cooling system and other stuff I am doing to get ready for summer.
 
I decided to do a cam swap because for about a 100 bucks the new cam will give me 35 more HP, put less stress on the valve train, and well OK I'll be honest and it has a much more wicked idle!
Surprise the cam won't come out because it hit's the core support.
 
Yeah like that would stop me and out comes the saws all! :-)   I got it all back together and if you want to hear it check out the flare video update mentioned above.   
 
Also new this year I decided not to mess with the cooling issues anymore and went for broke on a HUGE radiator.  It's a beast at 5 inches taller and 2 inches wider than my old one!

It is an LS swap radiator for a 60s Chevelle and given that car probabaly weighs 4000 lbs I think I will be in good shape now. 
 It looks low but dosn't not hang down any farther than the AC condenser did.

I had to cut the radiator support quite a bit to push it upwards in the car. It clears the hood by just a hair.  I think it is the biggest possible radiator you could put in an NA miata.
 
This is the new cooling fan to go with the bigger radiator.  It is a 16" and the old one was 11".  It makes an absolute hurricane!
 
I set it off the radiator using a piece of fuel line because a little space between the blade and the fins moves more air. 
 
I finally put horns back in and these are the Camaro horns.  No cute beep beep in this muscle car!
 
The other thing I did under the hood was made a brake pedal support at the end of the master cylinder. 
 
The firewall flexes when you mash down hard on the brakes in these cars and this anchor at the end of the master cylinder is the fix for it.
 
 
I found a great deal on a metal strap mount fire extinguisher so I welded up a proper mount and put my old plastic strap wood mount extinguisher to use elsewhere.

 
I whipped up a couple luggage racks using the wing mounts for them. This one is a tire rack and I also made one to fit my bass drum so I can gig with the car.

 
That about brings you up to speed on the mechanical stuff. I have more body work to show you but will wait till next time so this doesn’t get too long.
 
I hope you had a wonderful Easter season. I always ponder which I enjoy more Easter or Christmas but always decide either would be useless without the other!


Tuesday, April 8, 2014

Important stuff for building a V8 Miata - what I would do different.

Tech overload alert!  This is a purely techie post intended for those considering building a V8 Miata and will have no entertainment value at all.

As people ask me questions about how I did this or that I have noticed I keep saying “if I was to do it again I would have…”   So I thought I would crunch all those thoughts down into a post.
Yeah that little bit of rust and all those door dings are a much bigger deal than you think it will be.  First up I would have started with a clean car.  It makes no sense to put hundreds of hours and 10 grand into a car that needs a bunch of body work.  It is far cheaper and easier to start with a good clean car than to do body work or fix rust.   If I was smart I would have bought a clean car, swapped the engine and suspension from it into Jenna to use a daily driver and converted the clean Miata.
Now I do have to point out there are exceptions.  If your grandmother bought your Miata new in 1990 and left it to you in her will that is a whole different deal.  

Kits are grossly overrated and grossly overpriced. The common perception is parts made from Flyin Miata, Monster Miata or V8 Roadsters are better than DIY because they have made hundreds of them and they are proven to work.  I thought that too going in and depending on the skill level of the fabricator that might be true.  However if I was to do it again I would not buy any kit parts except maybe the axles.  Let me give you a breakdown of some of the common kit parts.

V8R subframe is $1280 shipped. If you going to buy any part this is the one because it is the most complicated one in the build.  But you have the pattern with the stock engine cradle and it's not hard to make a plywood V8 to use for a mock up. I could have made the engine mount for $150 in steel and motor mounts and put that extra grand to much better use.

All the kit makers have the same type transmission mounts which is a couple feet of 1x2 with a pipe cut in half welded in the middle. They are priced around $400 but I built a far better mount for 45 bucks in steel, paint and a new Fbody trans rubber mount.
Monster Miata diff mount was $450 and sorry Martin but it is a stupid design.  I could have easily made a much better mount for 65 bucks including all new poly bushings.

Flyin Miata Clutch kit was $260 and the same parts from Speedway or Summit is $120 but you would have to make a simple adaptor to bolt it in.

Flyin Miata V8 radiator is a whopping $950!  Lots of options here but the the LS swap radiator I used from Griffin was $270. It is part # 8-00009-LS designed for a Chevelle but if you bend the mounts to 90 degrees it works fine in the Miata.

There are more but you get the point. 

Now there is no question building these parts is more work and generally the resale value of kit bought parts is higher than DIY, but kit parts are NOT better than DIY from a decent fabricator.  Actually just the opposite is true.  Click the links for the best transmission mount and the best diff mount I have ever seen and both are DIY made.  V8R, Flying Miata and Boss Frog are just normal guys in a garage building parts same as you and I.

Deadlines are satins idea and not good for you.  Most guys that build these cars are goal orientated males that envision themselves tooling down a windy country back road with a hot babe and a cool exhaust note.  Well I’m here to tell you one of the biggest mistakes I made was setting and missing time goals for the build.  It’s the wrong focus that leads to corner cutting and feeling like a loser when you miss.  There are so many things that are beyond your control that impact the time line to build a car like this and virtually everything takes longer than you think it will.  Savor the build process as you would any once in a life time experience and remember it may take a year or two to build but you will spend the next 5 to 50 years with that hot babe enjoying the car.

Tips on planning and building your car.  If you have gotten this far reading this I’m going to assume you are serious about building a car and I would like to give you a few general tips to make the process go better for you.
1 The old sayings around this subject are just as true as they ever were. There is no replacement for displacement. You can have reliability, tons of power or cheap pick any 2. And if the wife aint happy, nobodys happy. 

2 Marry well. If your wife doesn’t support this your build is doomed. Also if you have younger kids spend the time with them now while you can because I can tell you first hand it really stinks when they leave for college.

3 If #1 and #2 are not in good shape stop here, buy a sensible car, focus on what matters.

4 Planning is everything. Take at least a month and read every build thread you can and study the conversion web sites closely. I have yet to hear of any build costing what the builder expected it would so pay close attention to what parts are used so you can cost them in your plan. The big stuff is easy to figure but it's the dozen trips to pick up $20 items that eat you alive. As you weigh the decision to build factor in 30 to 50% more than you think it will cost to build your car and you will probably be about right. It's no fun having Visa own your build when it is done...
Also consider insurance for the car when it is done is rather tricky. See this post for info on that.

5 When you are confident you understand the process develop a build plan. The core of the plan should be a list of needed parts, tools and supplies in the order they will be needed. Consider carefully the lead time for parts in the sequence of the build. NAPA will have the new CV joints on the shelf but the custom axles could take months to get. It’s no fun overrunning your supply line and waiting for parts.


6 Get your shop ready. Now is the time to hang the extra lights and pick up the HD jack stands you have always wanted and don’t skimp on either of them. Also clean all the crap off your bench and from all the corners of the garage because you will have tons of parts to deal with. You are going to spend at least 200 hours on this so make your work space as comfortable and organized as possible.

7 Lay in supplies. It takes 5 rolls of electrical tape, 250 wire ties, 15 cans of brake clean, 1 roll of gaffers tape, 1 roll of masking or painters tape, 1 can of liquid wrench and a bag of floor dry to build a v8 miata. (note a 50/50 mix of ATF and Acetone works 3 times better than anything in a spray can like PB blaster or Liquid wrench) Also pick up a new set of safety glasses, another fire extinguisher and hearing protection. Beer, tea and piss bottle as necessary...

8 Stoke up the tool box. Beyond the obvious hand tools it is very helpful to some duplicates so you don’t waste time looking for tools. Assuming you already have a fairly complete set of hand tools I suggest you add:
3 each of wire cutter, LED pen light and utility knife. (Keep one set under the hood, one set inside the car and one set in your pocket)
2 each 10 mm combination wrench, 12mm combination wrench, 14mm combination wrench, 10 mm deep socket, 12mm deep socket, 14mm deep socket.
1 each 17mm combination wrench, 17mm deep socket, 13mm combination wrench, 15mm combination wrench, 13mm deep socket, 15mm deep socket
9 Prepare for the mental game. The 2 biggest things that trip most people up are wiring and exhaust but most builders don’t expect or prepare for the mental strain of the build. The warnings you hear about this being a marathon not a sprint are true. It is really easy to get down and feel like you are never going to finish when you see little progress with much effort.

I have found the trick is to take the big picture view when I plan but when I head out to the shop just focus on one job at a time. When I don't the enormity of the project freezes my brain like a deer in the headlights every time. With so many systems and parts in process at once it is overwhelming but if I leave my to-do list in the house and just focus on one task in the shop I know exactly what to do next and how to proceed. So even though my list is huge it makes no difference because I only have one thing to work on tonight. And slowly but surely the day will come when that list is down to just a road test!

Remember as you go your build is not going to be amazing someday when you are done - it's amazing now!

10 Your camera is your friend. Take photos of EVERYTHING! Not just for the build thread but to see how it was before you messed with it. I can’t tell you how many times I went back to my photo file to see where that bracket went or how whatever tank bolted on. Yes you will think it is a waste of time and you will never look at a shot you are taking but trust me on this one you can't take too many photos as you go.

11 Be careful what you sell or toss. I went to my Camaro carcass more times than I could count for things I never dreamed I would need. Need a line for the overflow tank? No problem the Camaro fuel line is perfect. Need a heat shield? No problem the Camaro has tons of them. Need a longer 15mm bolt? You get the picture don’t clean out the parts pile till you have some miles on the build.
I hope this post has been beneficial to you as you consider your build process. When you get frustrated and down just remember this

Wednesday, July 31, 2013

Debugging the little bugger

I’m starting to feel like Ender battling the buggers in the classic novel Enders Game!  The good news is the bugs list is getting shorter. 
 
I finally got the brakes bled by bleeding them backwards.  I took off a rear brake hose and stuck it in a jug of brake fluid then put the vaccume pump at the line on the master cylinder to beed them from the bottom up rather than the top down.  It worked!  It sure feels good to have a firm pedal again! 

I tried everything to get my lovely purple brake proportioning valve to stop leaking at the housing seal and finally replaced it with a boring silver one.  Sad day because it’s only a year old and worked fine in the Camaro.  Another $50 over budget too!
 

I pulled the exhaust system out to rework it for more ground clearance.  I had to wait till Saturday for parts and since it was a payday Friday I decided to drive it to work.  So I shoved the catalytic converters on the headers and had an extremely noisy commute!  She got me there in fine style don't you think?
 
After my fix of feeling like a highschool kid was done I pulled the transmission mount and reworked it to be 7/16” higher in the middle of the car than it was. I left the corner braces hang down because they are so close to the wheels they will not be a problem.

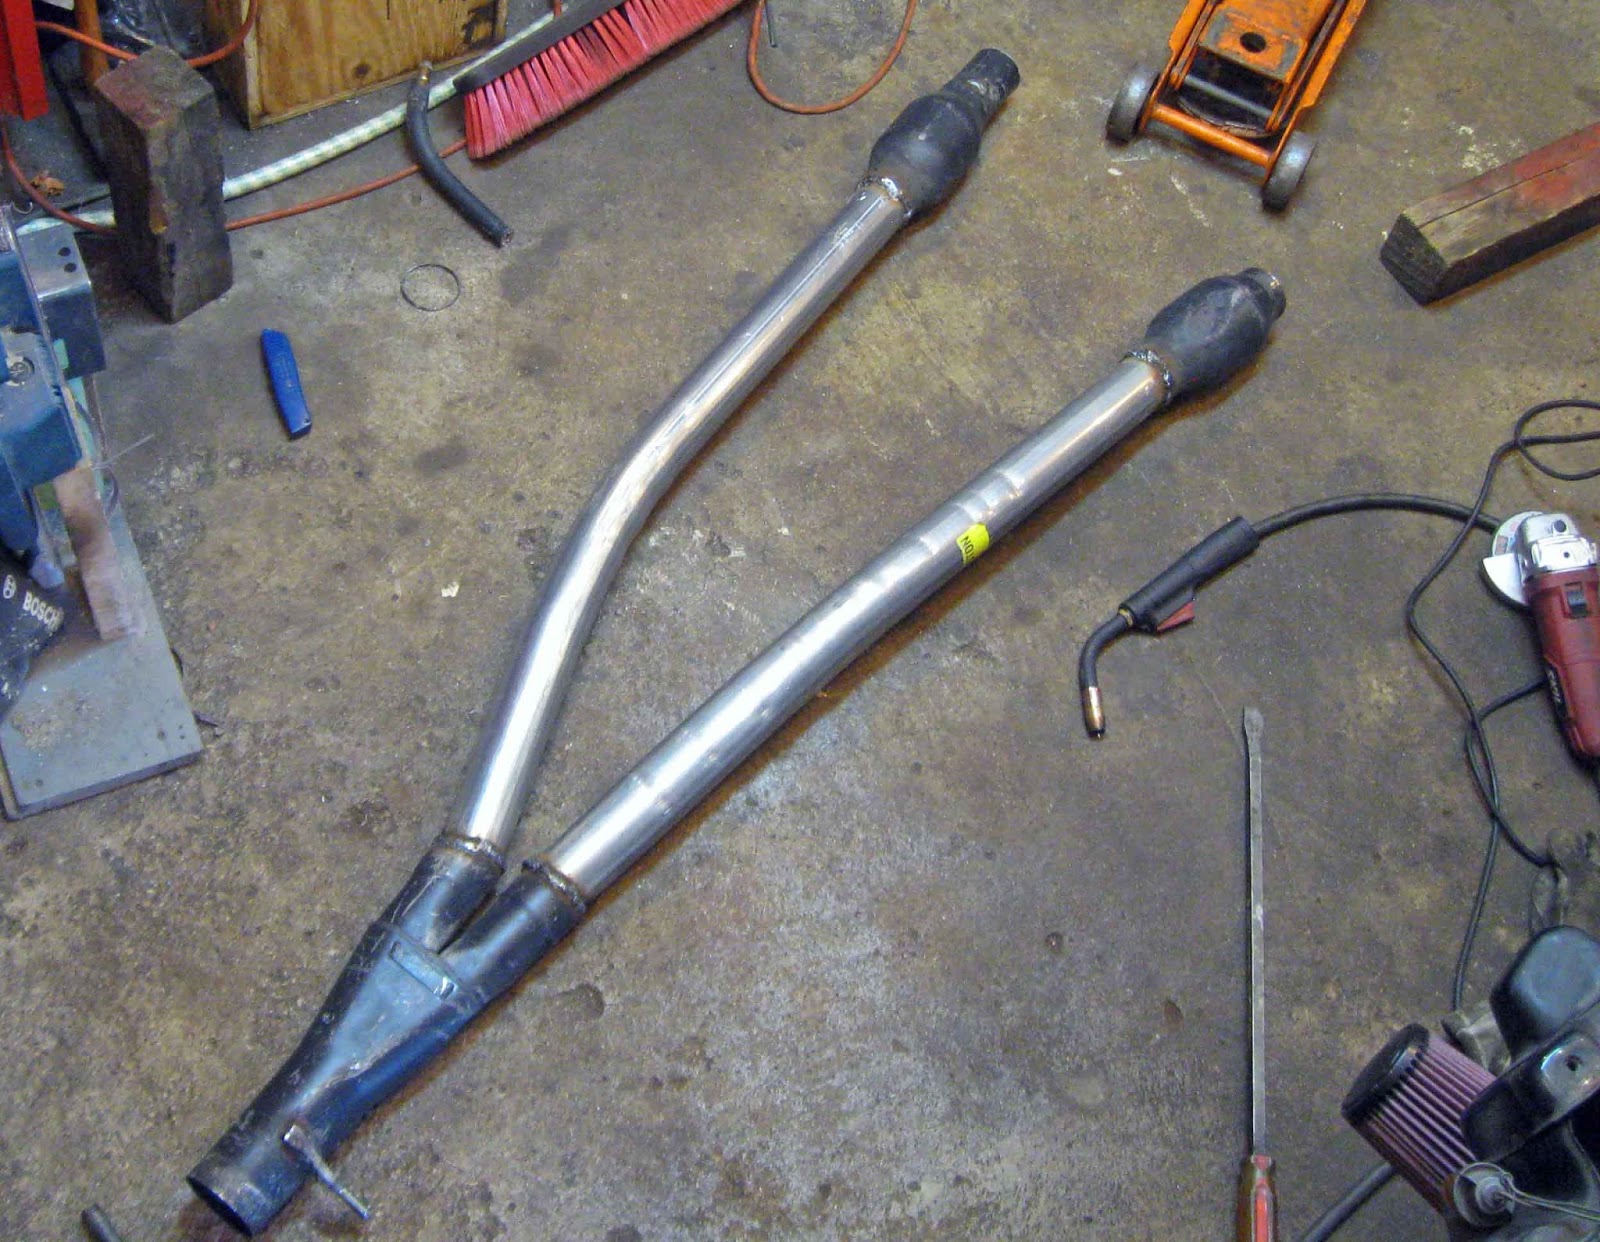
I moved the Catalytic converters from the center of the car to the headers and gained about 3/4" of clearance in the middle of the car from that. They do hang down off the headers but since it is near the front wheels it should not be a problem hitting things. Finally I put in new pipes that are bent to tuck up higher in the car and I made them slightly oval shaped at the trans mount to gain another 3/8” or so in the center.
 
 
Before:
After:
The pipes are almost flush with the frame now.  

 
After adjusting the coil overs up 1 turn in the front and 3 in the back I have a total additional clearance about 1 3/4" right in the center of the car where it is needed the most.
 
More before and after shots:


It has about the same amount of clearence as the Camaro did and I can live with that but I think it will be better due to the shorter wheel base. 

I put the hood and bumper cover back on and remembered thinking as I took it apart and the rusted bolts broke off, "I have a long way to go here so I'll worry about these bolts later".  Well as later came I figured my bumper cover is such a mess it needs to be replaced so I’ll deal with the broken bolts when I find one...:-)

I still have not washed it yet...  What do you think turn signals in or not?

For you kids trying this at home the Flyin Miata hood supports work pretty good.  See in the above photo they do tend to push the hood up in the back when it is closed due to the pressure they put on it.  I have a set of Areo latches going on this weekend that will help that.


I have my door bars in and roll bar bolted down now. 

 
By the way in case you are wondering if seam welding and all the braces I put in are worth it check out this shot.  See the gap between the front wheel and the ramp?  With the front wheels up on the ramps I jacked up the right rear and the chassis is so solid the right front went up with it!  

 And that was before the door bars and roll bar was in!
 
I still some bugs to work out and no doubt when I start pushing the car will find more.  (Grandma if you are reading this skip to the end now cuz the rest is really boring)  I do have a slight driveline vibration between 93 and 100 but it's smooth after that so I'm not sure if I am going to mess with the diff angle or not.  I know I threw it off when I raised the trans mount 7/16" but I didn't measure it before or after the change to know if I am in spec or not.  I figured I'd just wing it and see if it is smooth or not! 
 
Well I hope this post finds you happy, healthy and living in the joy of the Lord! 
____________________________________________________

Hood strut update!  I talked to Keith at Flyin Miata and he said if you turn the struts around they don't push the hood up when it is closed. 

He was right it is much better. Now if they would just change their instructions!!

Saturday, July 20, 2013

LS1 first start - the post we have all be waiting for!!

Sorry my video camera died at the track last year so all I have is a point and shoot to do this.

Turn your volume up and
CLICK ME!
.

Tuesday, July 9, 2013

The 3rd half of the back half, 8.8 Ford axles in a Miata.

Yes this is the 3rd post on rear end work but it should be the last!  I’m getting close to being done with the chassis support plan Charlie and I started at Christmas.
 
I added side to side support to the lower control arms creating a box with the welded braces I put in when I had the subframe out.

Then from the tabs at the end of the frame rails I connected the rear subframe with a welded in brace.

Click on the photo for a bigger view.
 
Looking at it from the side you can see how it makes a box out of the existing structure to really support the rear suspension.
 

With the welding done I finished up the mechanical stuff. 
 
First in was the new rear wheel bearings with my trusty bearing press.
 

Then it was on to rebuilding the T bird axles to fit the Miata.

For those of you trying this at home I recommend the Audi boot on the right for the outside as they are nice and short to clear the shock. The normal Tbird boot is on the left.

You can see the box it came in here with the name and part #

And the clearance it gives you.
 
 
 This is a stock Thunderbird axle next to one modified for the Miata.
 
 
 The new longer studs, seals and monster shim is in and ready to roll.

 
 No I didn’t clean up the rotors because driving will do that and they will be replaced with larger ones next year anyway.
 
I blead the brakes and filled the diff so now if I could just get my computer back from the tuner!!

After 4 months of being on jack stands she is back on her feet!


In other news I am sad to report my racing seat from the Camaro won’t fit in the car.


Well it won’t fit yet anyway!  The good news it’s made out of fiberglass so it can be eaisly adjusted and there is plenty of room in the tunnel to induce a tolerance with my favorite bearing press...:-)

 
Now just between you and me I have to tell you something.  I have not looked at our club site for months but this morning I got a message from a friend in the car club I race with.  When I went to the site to retrieve it I noticed this weekend is a race weekend.  Yep you guessed it,... it took about 5 seconds to calculate I had 104 hours until the drivers meeting on Saturday to get Jenna track worthy.  But I'm not telling her that!….