For a quick overview video of the process start to finish CLICK ME.

For the detailed story starting at the beginning CLICK ME.

You can click on any photo in the blog to make it bigger.
Showing posts with label Wiring. Show all posts

Tuesday, June 25, 2013

Wiring - does it ever end?

Doing the preliminary wiring on the car before I put the engine in was the right thing to do.  However getting side tracked for 2 months before finishing it was for sure a mistake!  I ended up spending a couple of nights chasing wires trying to figure out what was not done and second guessing myself on if things were done right.

The good news in that is I found a mistake.  Or two… ah..., OK or three already! Turns out when you are tired and 25% color blind Black / Blue wires are easy to confuse with Blue / Black wires.  Hey you try it which is which here?

 
I also discovered a little A/C issue that tripped me up for a couple of hours.  The pressure sensor in the Camaro had 3 wires from the computer and apparently uses some logic to watch the system.  The Miata pressure sensor is a simple 2 wire switch that turns the compressor off if the pressure is too low.

Nope the Camaro sensor won't just thread on the Miata pipe or this would be easy! 

While I let that problem percolate in my mind I dug into the anti-theft system from the Camaro to figure out how to wire up the body computer to make just that circuit work right.  In the old days it was easy to defeat the anti-theft by just wiring in the right resistor, but now the system uses a data pulse that is much more difficult to replicate.  The body computer will do it but it also did a ton of other stuff in the Camaro that the Miata dosn't need.   

 After several days of consideration I decided the answer to both problems is another 75 bucks over budget to have the computer reprogramed. They will take out the anti-theft and computer control of the A/C. There is no reason for the computer to bump the idle when the compressor comes on when you have 400 ft lbs of torque anyway!  They will also remove the evap and gas tank pressure stuff and set the speedo to the right gear ratio.
 
The down side to this is I had to rewire the A/C system to a stand alone system by adding a relay and rewireing the fans.  No biggie but still the hours of wiring work keep piling up!!


With the computer on the way to Missouri I dug into another little project I have been planning for months. Miatas have terrible factory gauges. Both the oil pressure and temp gauges are actually idiot lights that look like a gauge. The other problem is there is no place on the dash to put good gauges in. 
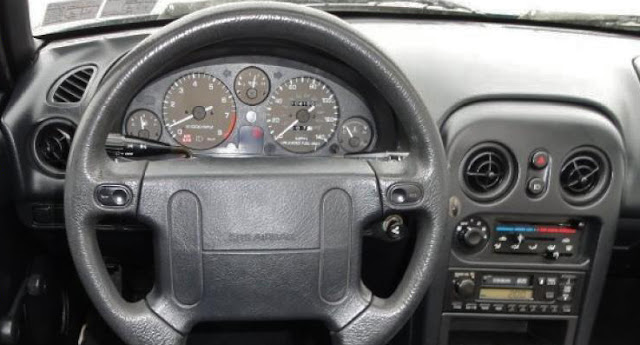
A lot of people take out the center 2 A/C vents and put them there but I really want A/C to work right.  The center of the dash is too far from eyesight for critical gauges anyway.

So in my usual mode of thinking rather than sleeping I came up with this idea using $8 ebay gauge pods and a couple hunks of 3/4" x 1" aluminum angle. 

This is the dash around the instrument panel with little pieces of angle cut into it.
 
The 3/4" leg is out and the 1" leg is stacked behind the plastic. I didn't know it at the time but stacking them so the longer one is in the upper postion was a mistake. You'll see why below. 
A bit of my favorite urethane to hold the aluminum angle in place.

And the pods.
Like so!
Sweet right?
See how the lower one is right up against the A/C panel?  If I had stacked the aluminum pieces the other way or just made the lower prong longer I would have had room to move it forward from the A/C panel. 20/20 hindsight! 
 
At the other end of the gauges I have the temp sensor in that you saw before
and here is where the oil pressure line leads too.  
I tried to find somewhere under the car on the frame to put the remote oil filter but this was the only decent place I could find for it.
The other sensor in the housing is for the factory gauge and I will probably put a strobe light or buzzer on it too.  
 
It felt like I spent a ton of time going in circles on wiring this week but I did get enough done to call it a good week. Now that the oil and cooling systems are sealed up with just a little work on the power steering I could dump oil and water in it and turn the key... Mwahaha!! :-)
Shout for joy to the Lord all the earth and worship Him with gladness!

Tuesday, May 7, 2013

Wiring page 2 - The tangled web I've weaved!

Well I am sort of done wiring.  I still have about a dozen details to sort out like the backup lights and A/C functions but without the engine and dash in place I can’t go any farther.  
I tell you its really scary how many wires I think are not needed that I cut out of both harnesses. 
These should not be needed but I’d be shocked if everything works!

When I was in the dealer I used to say you live or die by the schematic and the meter and I found that to be very true with this experience too.
  And I love the GM schematics!
What is concerning going is forward is I no longer have a good schematic of the car to work with.  As soon as I ran a wire from the GM harness to the Miata harness both existing schematics became inaccurate.   
I envision a time half way through One Lap of America with something not working and having a nightmare of electrical issues to sort out.  Of course it would happen in the middle of nowhere at 2 AM!  Even now I have no idea if the work I have done is good and there is no way to test it before I try to start it.

So all I can do is move forward the best I can.  But before I do I would like to leave a note here for myself on the next build and others planning their build a couple of things I would do differently.  In order of importance:
1, limit music selections to Norah Jones with some easy Rory Block, Lisa Mann and Michael Buble for variety.  Simple, easy and relaxing tunes are paramount to the process.
2, have at least 3 wire cutters, 3 small LED flashlights and 3 utility knives.  One set for dash work, one in the engine bay and one set in my pocket.  That should reduce the hours spent searching for them by at least half.  :-) 
3, remove ALL unnecessary wires in the Miata before you even take the Camaro harness out of the box.  Working around a half installed Camaro harness to do it is really a PITA.
4, take more photos as you take things apart because you WILL forget how the dash harness was routed and where the fuse box bolted in.
5, remember thinking I know I am not going to use this so I don’t need to mark it?  You were wrong!  At the moment I have 3 wires that are tagged “unknown probably not needed”.  No wonder I sleep so lousy!

In other news I had an interesting turn of events in the parts department this week.  The wheels I ordered are back ordered for 6 weeks.
I love those wheels but am hoping to need them before I would be able to get them. 

Meanwhile I found a set of used fender flairs on a forum for 125 bucks.  They are just bolt on arch flairs not a full fender flair so they will look like this

This is a big deal because I got them for 1/3rd the price of new and because it opens up 0 offset wheel options.  It will mean more body work but I can live with that for the pay off.  So with that I picked up these wheels in a 0 offset


The spokes are more bronze then this on the real wheels and with the 0 offset they should fill up the wheel wells about like the above car. That JPS car is steadily growing on me to be my favorite and I might just have to reevaluate the wing idea…
5/30/13 Wheel update HERE I did not use the flairs or the wheels due to scrub radius issues.

Speaking of body work this week I connected with a fellow V8 Miata guy that passed along a great idea for the hood.  After a couple hours hunting around for photos of various L88 Corvette hoods I decided his idea is the way to go and ordered this mini version of a Corvette L88 hood scoop. 
It will be a lower, smaller and much less radical version of this concept.
Is that cool or what?  Thank you Shannon for a much better idea on the scoop that I was planning!!

7/6/13 Scoop update HERE I did not go with the L88 scoop but used a Camaro SS scoop instead.  It turned out to be not such a good idea because I still needed a vent but that is a whole other post HERE.
 
Now of course when I started all this I had no intention of doing this much body work to the car.  The rust is a big enough problem to deal with without hanging flairs and scoops on it too. 
But what’s another 10 hours of body work in a 2000 hour project right? LOL!
 
God willing next post Jenna should be sporting her LS1! Yahoo!!
 
PS if you did not click on that One Lap of America above you should check it out. I have followed this event for years and it is very high on my bucket list. My dream is to do it with my son Charlie and Jenna would be a great ride for the adventure.  Anyway the race is running this week so and it's fun to keep up with the events.
 
Proverbs 27:17 Just as iron sharpens iron and one man sharpens another.  Have a GREAT week!


Thursday, May 2, 2013

V8 Miata Wiring - It's easy to be brave from a safe distance…

For the last 4 months it has been easy to say “I’m not worried about the wiring”. Truth to be told the day I laid out the entire Camaro harness in the living room I began to feel a bit uneasy about it. If you missed that adventure CLICK ME.

It would have been easy to put this off and do fun things like weld up the transmission mount but I resisted the burning desire to weld more knowing the plumbing and electrical should get done before the engine is in the way.  I did the plumbing first because I thought that would be quick and easy.  Key word there is thought! 

I had an adjustable proportioning valve on the Camaro I wanted to use but the valve has 5/16s ASE fittings on it and the Miata brake lines are 8mm metric. Like everything in the build the easy answer is to send Flyin Miata a small fortune for custom adaptors. But I did what any cheapskate would do and eyeballed the 8mm brake line to figure out it is just a hair bigger than 5/16s, then lopped off the commie metric fitting and put a proper made in the USA 5/16s on them. 
My cheap and exceedingly brilliant solution was foiled because the Miata brake line is made from some funky hard material that splits when double flared.  After 3 failed attempts I ran around ripping off all Mazda emblems from the car in a tirade then replaced the entire rear brake line with NAPA brake line that flared like a dream. This is why we own American muscle cars people!

So with my warm fuzzy feelings about Mazda I faced the giant and opened up the Miata wiring harness. 

I quickly discovered 2 things that made me look for more Mazda emblems to rip off!  First there is a couple of weird data link connectors with useless wires that run all over the place and second the factory wiring diagrams are just marginally better than nothing.  At least nothing would be accurate! 

 To give you an idea of the scope of this the GM engine computer has 128 wires that need to find a home and the Mazda computer had 54 most of which need to be safely abandoned.  The 96 instrument cluster has 27 wires on 2 plugs that need to be completely rewired to 30 wires on 3 plugs for the 99 cluster, plus a speedo calibrator box with another 5 wires.  Ah but that’s just playing follow the string on 200 wires and doing a little soldering.  No biggie there. 
  What gets cute is all the little details like Mazda triggers most of their relays by supplying ground while GM triggers their relays by supplying power.  Then there is the Camaro anti-theft system that won’t let the car start unless the body computer (that I am not using) gives the OK to do so. Oh and there is no help on how to do any this because Flyin Miatas solution is a $1800 plug and play wiring harness.

Galatians 6:9
And let us not lose heart for in due time we shall reap if we do not grow weary.
And with that good word if you don’t see another post for a month you know where I am!

Sunday, March 10, 2013

Snuggling into a big pile of wire!

Well it was a cold, rainy, raw kind of weekend so I had to find a warm comfy indoor job. With wifey at work and the whole day to myself I had my opening to take over the living room with the good stuff... That is hot tea, Top Gear and enough wires, modules and connectors to fill a bathtub!

This is the complete wiring harness, head lights to tail lights from the Camaro. (and the Stigg in an Audi)

It took an entire episode of Top Gear (UK) just to un-tape and remove the covers from the engine bay wiring. Then another entire episode just to defeat the incredibly stubborn bulkhead connector. I left the covers and tape on the actual engine harness because I know I am going to use that in tact.
 
It took another TG to remove the antilock brake stuff and head lights. By the time episode 4 finished I had the steering column wiring and rear harness with the tail lights and such removed. But I did have to stop for a minute to watch the TG guys shoot a car out of a cannon... :-)
From there I got into the shop manual and started following wires between the body computer and other components to try and figure out what would and would not affect the engine computer. I had to pause the Top Gear for that...
I worked on that for about and hour and realized how out of date I am. There is a lot of stuff I know from my days in the Chevy dealer, but a ton of new stuff that I have no idea what it is!
 
So I've got about 9 hours (and 6 top gears) into it over the weekend and I'm not done yet. Did you know that after about 6 hours staring at wire all colors except orange look exactly the same? Don't take my word for it try it yourself! And why is everything taking twice as long as I thought it would anyway?? Oh well it was really fun to jump into it and do some serious prep work on the Miata. Finally!

In case you are keeping track I am now 3 months, 4 days and 12 hours to my turn key go vroom goal. And on that happy note it's off to bed to dream about drowning in wire!