I was in
the mood for something different to do on this festive 4th of July weekend and
with no wheel studs or computer I figured I may as well do something totally frivolous. So I did!
I mentioned
a while back I was going to put an L88 hood scoop on the car. I do love that scoop and it is very
functional to vent air but
somehow I thought Jenna should have something a little different. Well, I'll let the photos do the
talking here.
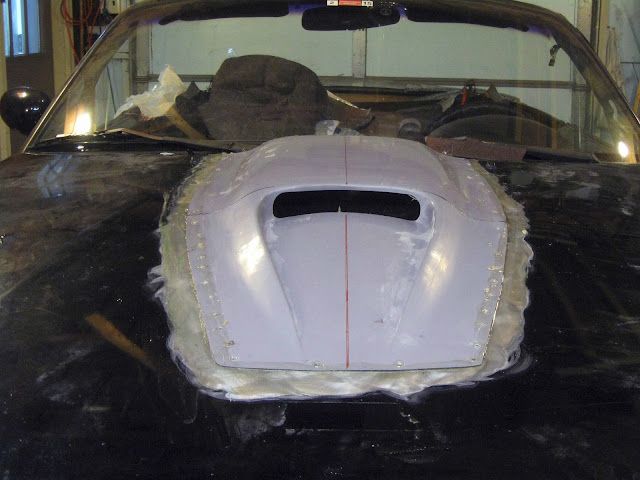
I had to cut away the existing hump in the hood to clear the new artwork, 
and I had to cut the new artwork to contour to the hood right.
But I fixed the cuts on the back with fiberglass. I do love working with fiberglass!
What the #@*? I know but just wait till you see it...
The front slots will support a partial wall to block air entering from the front and all 4 of them are functional to draw air out rearward.
I was told guys are using durabond or panel bond to glue scoops on these days but I tried it and it set up before I could even get it spread all the way out. So I went back to what I know and used 2 layers of 1oz matt (very thin) and fiberglass resin to bond the scoop to the hood. The holes all around will help bond and when I put a dab of glass on the back to connect front and back it makes a better bond anyway. This is the same way I put the Shelby scoop on my 65 Mustang back in 1980!
I also added strips of 6 oz matt on the back and bonded the flaps to the scoop with fiberglass.
Ahh nothing like the smell and feel of fresh fiberglass in the morning! Sticky stuff!
The structure is far more solid than Mazdas design! Quick tip if you are going to cut a hood put a dab of polyurethane under each of the contact points between the braces and the skin. It really firms up the structure and holds it's shape even when cut.
I cut out the back of the scoop to vent under the hood and added a heavy layer of matt in the rear of the scoop. You could stand on it and it would not break!
And now the shot you have been waiting for...
I ground the flange flush with the hood and blended it in with duraglass and featherlight. And sanded for a couple hundred hours!
Wait for it...

Not yet...
Now!
Yes it was a total waste of about 20 hours and 100 bucks but you have to admit it is very sexy!
I know venting out the back will not work at speed and actually hurt air going through the radiator but have a plan if it is a problem. I just wanted to do this one thing for looks only!
By the way does it look familiar to you?
It does to me!
I always did love that hood.

So with the same engine it just seems right to have the same hood scoop!
Now for those of you who would like to try this at home you need to check out my post on cooling HERE. In a nutshell leaving the back open and trying to vent through the scoop was a disaster so I sealed them up and put vents in the hood where they belong.


Romans 1:16 - Live it!
I am not ashamed of the Gospel of Christ for it is the power of salvation to all who believe!


No comments:
Post a Comment