For a quick overview video of the process start to finish CLICK ME.

For the detailed story starting at the beginning CLICK ME.

You can click on any photo in the blog to make it bigger.

Thursday, May 30, 2013

No Fury like a women scorned!

I don’t know what’s going on but ever since Saturday I seem to be on the wrong side of Jenna. She is in a full blown snit bucking and fighting everything I do. Bolts either break off, cross thread or I can’t find them. Welded nuts that should pop off 
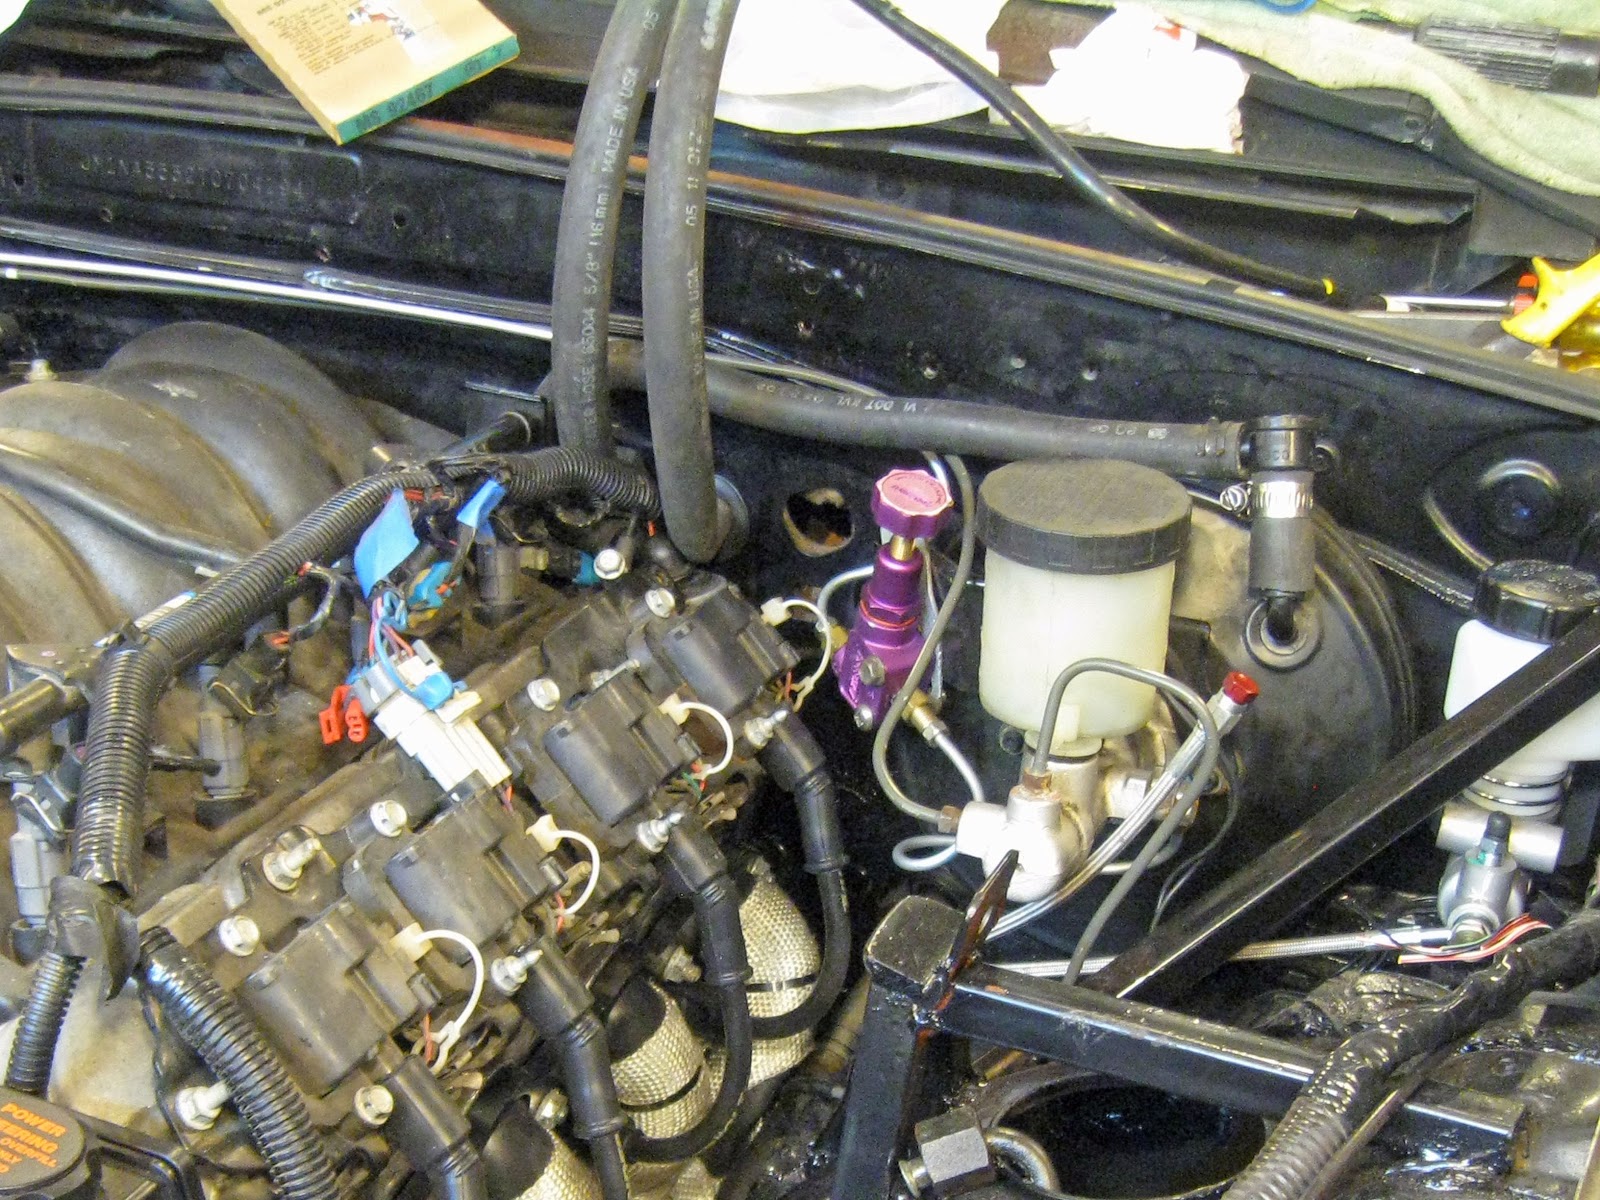
with a touch of the air hammer have bionic strength. Parts that should bolt right in like the special Flyin Miata V8 sway bar and power steering adaptor kit don’t fit. Even just dumb stuff like banging my knee on the partially open door I have walked by 100 times without hitting.  And that really hurt!

With all the buckyness I’ve probably gotten 3 hours worth of work done in the last 8 hours of effort. What’s worse is based on my research I thought I could use the Miata fans and the Camaro fuel pump but neither of them will fit. $$$!
 
I joked with Charlie before I started that we might have to rename her Senna after the legendary F1 driver. Perhaps she is taking on his equally legendary cantankerous personality!

Then there is the wheel saga that is completely my fault but still making this week difficult. The first set of wheels I bought were back ordered till July. Then I found a cheap set of used flairs so I was able to fit 0 offset wheels and went that route.  Cool right?
Well after I posted that a guy told me the biggest mistake he ever made was cutting his fenders to flair them. There is no turning back from that and no reason to flair them and push out an 8” wheel. Flairs with a 10" wheel is cool but anything less falls into ricer territory. Humph…


But a bigger issue is I discovered wheels with less than +20 offset move the suspension scrub radius out too far and adversely impact the handling of the car. On a Miata +36 is optimum, +25 OK but 0 is horrible which is why all of the expensive forged racing wheels are +36. Humph #2...

So my beautiful 0 offset wheels are listed on ebay and the hunt begins again for wheels. 
But hey maybe with a new set of wheels and shoes Jenna will play nice again!

Not to be out done my wife made a rather odd comment this week.  She said "You can't die while the garage and basement is in such a mess".  OooooKaaaay dear...  I said as casually as I could "no problem just leave it all for Charlie and he'll put it to good use".  But you know how you ponder such things and replay them in you mind?  Is that a wifely premonition?  Good grief what would the poor dear do with this mess if I suddenly fell off the planet!  Wait, is she in cahoots with Jenna to do me in and end all this nonsense?  This is just such a weird week! 

I'm really only posting this for me to look back in a few years and remember what these days of struggle were like. I know these times of difficulty will make the reward that much sweeter and while I have my doubts about making my start up date I have no doubt Jenna is going to be amazing when she does run.

For everyone who has been born of God overcomes the world. 1 John 4.  Yeah that is a bit out of context but still a great word!

Tuesday, May 28, 2013

Odds and ends and oops

The plan for the weekend was to weld up the diff mount and finish the trans mount but the weather was cruddy and I didn’t want to open the garage door to weld or lay on the damp floor. As usual there is no shortage of other work so I messed around up front.
 
I have been slowly coming to the conclusion that unless I drill a large hole in the firewall or extend about 100 wires I was not going to be able to have the PCM inside the car.  I knew my corner brace was going to make it tricky to mount the fuse box and leave no place for the washer bottle but now I need to find a place for the computer as well. 

With just a little modifying on the PCM it fit nicely between my 2 added braces and I was able to bolt it to the strut brace.   From there I made a bracket to mount the fuse box to the corner brace and it looks like this.
 That led me to my first oops.  I tried to plug in the connectors on the transmission but the wires would not reach.  I had the wiring harness laying on top of the engine
But it’s suppose to be behind the heads on top of the bell housing.  In the Camaro there was a nice space there but in the Miata you can’t see either from the top or the bottom to know if there is a gap.  I pondered a hole saw in the fire wall for a view but instead pulled the bolts from the cradle and dropped the engine down about 3 inches to peek in there.  Still no real visibility so I went back through my photos and found the solution.  These are old photos from the build to show you.
No room between the passenger side head and the fire wall but if I route it over the head and then in the valley under the vacuum lines there is a just enough space to thread the harness through the maze.
So I worked it down in there and slowly jacked the cradle back into place.  There seems to be some wiggle / slack in the harness but all I can really do is hope I did not crush it! Yes those are 2 large hammers at the right of the photo.  There have been many situations in the build that I have needed to induce a tolerance... :-)
 
Even though I covered the wire harness and fuel line with heat tape and the headers are wrapped I was not comfortable with the fuel line running 2 inches from the header.  So I chopped up another Camaro heat shield and made a shield for them.
Sorry that is kind of hard to see.  Try this
As one thing kept leading to another all weekend it dawned on me that while the cradle was loose it would be a good time to run the heater hoses.  So I pulled the dash, glad I had not put any screws in it, and put the heater core in. 
That is when I discovered oops #2.  When I put the pedals back in I forgot to put the seal for the steering shaft in plus I missed one of the studs and bent it.  That took an hour of monkeying around to fix and another half hour to find the seal….  But now we have heater hoses through the firewall and the steering shaft seal in.
Notice I also have the vacuum line to the brake booster hooked up now.  For those of you trying this at home with an F body downer if you turn the brake hose around so the booster side is on the manifold it fits pretty good in the Miata.  The check valve 90 degree fitting is also from the Camaro.  

While in the pedal department I dug up the Miata throttle cable and modified the Camaro mount to use it.  I thought I had a major show stopping problem when it would not go all the way to wide open throttle but it was a carpet issue that was quickly resolved.   Shew!
 
No photos but drilled and tapped a hole in the radiator for the steam vent and I took an old mouse pad to make some lovely rubber pads for my radiator mounts.  I also installed and made covers for my very sexy new Taylor plug wires.

The next bit of adventure took way too long, was way too frustrating, and didn’t turn out very well.  Remember I said I did not like the threaded rod on the strut tower brace?
Well to make a long story short I fixed it, didn’t like it, cut it apart, grinded for an hour, welded it up again, got tired of working on it so I just painted it, then I wished I would have installed it one last time before I painted it!
It was perfect but warped when I welded the center under the cut out so it sits about 1/2" higher than it should be and I had to shim it at the end.   I’m not sure I can live with that much gap between the bar and engine but will see if the hood fits before I pull it apart again.
Oops number ?? I also managed to cross thread one of the end bolts and had to tap it back out.  Gurr.  Yes it’s gold but I had to paint it with something and am getting tired of black!  But I am very pleased with the rigidity of the brace and the way it supports the structure. Other than the gap I would not change a thing in my set up.
 
I used part of the old Camaro heater hoses to connect to the hoses I put in from the heater core and finished that up.
I’m feeling pretty beat down, tired and discouraged after the long weekend and probably should take a break for a few days.  I got a lot done but not what I planned on and not much if it went smoothly.  I love this verse and the thought that the Lord God creator of all could possibly love me enough to sing over me Zephaniah 3:17 “The Lord your God is in your midst, the mighty one who will save; he will rejoice over you with gladness; he will quiet you by his love; he will exult over you with loud singing”  How cool is that!  To think the creator of all we know sings over me with joy.  Loudly even!  I still have my doubts if this car will ever run but there is no question I am loved by God!!

Wednesday, May 22, 2013

The devil is in the details!

So remember when I got the incredible deal on a complete exhaust system?  If not CLICK ME for the story on that. Well the things you don’t think to ask in a phone conversation like are any of the tubes smashed to half the size they should be?  Like to clear the steering shaft or something?  LOL!

After wondering how anyone could think smashing a tube that far could be a good idea I started searching for solutions. It took about a minute to see I was in trouble because I can’t afford $250 for a new header and there is no way I would run it like it is.
 
So after a couple hours of thinking on it and messing around this is what I did.
Yeah you see where this is going right?
NO zooming in on the welds!!  Trust me it won't leak!

Come on admit it you didn't think it would work did ya? :-)  
Yeah I know it’s totally lame, totally getto and my welds around a pipe still stink but as soon as someone makes a set of Miata long tube LS1 headers I’ll be changing this out!

Before installing the headers I made some equally getto motor mount heat shields from an old Camaro heat shield.
Here is the header, starter and dipstick installed.  I made a little heat shield for the starter too.  

Since 1971 the Memorial Day holiday has been officially observed on the last Monday in May as the start of the summer with barbecues, blockbuster movie openings and mattress sales.
NOT! 

I challenge you to make plans now to set aside a time to honor our fallen heroes this Memorial Day. Never forget your freedom came to you, and is maintained, at a staggeringly high cost. 

Monday, May 20, 2013

The mother of all transmission mounts!

I looked at the options for transmission mounts and decided $300 for a hunk of pipe cut in half and welded to 1x3 box was a bit steep. I also did not like that the frame supports are so far from where the transmission is bolts to it.  This is what most kit mounts look like.
Boss Frogs is a little better with their side gussets but still way out of my budget.
Speaking of gussets one of the things a lot of racers do is tie center of the car to the corners of the chassis with an X brace. Flyin Miata makes a sweet brace that works on that concept for Miatas:
I love this brace but at 300 bucks it's not going to happen.  
 
So rolling both concepts around in my mind I started in on a trans mount.  First up was to set the exhaust in place and do some eyeballing with a hunk of 3” steel pipe.
After a few hours of measuring twice and cutting once I came up with a trans mount I like a lot.
The black 1" box on fhe floor pan bolts to the seat support beams where the floor is double thick and very strong.  I'm a little concerned about it transmitting vibration to the seats but we'll see how it goes.
I'll go over those tack welds when I pull it out to paint it.
I had planned on tucking the diagonals up higher and ending them on the tabs that hang on the inside of the frame but when I saw how low the exhaust hangs I decided to put them down where they can protect it some.
Those tabs will still get used though because there is more to come going rearward.

The mount may look like a beast but I am keeping close track and it only adds 12.7 lbs to the car.  The total weight of all my added braces is 39.1 lbs not counting welding wire or the roll bar.  Now if I could just lose that much weight we'd both be in good shape!

Building the mount went well but the rest of the weekend was frustrating and not very productive. I was planning on welding in the rear end mount but found out I don't have all the stuff I need for it.  Moving on to other things I found out Flyin Miatas instructions on how to use their kit parts is grossly inadequate. The power steering kit contains no instructions and I couldn't figure out how it works.  The clutch master cylinder kit instructions say “Assembly should be pretty straight forward” How is that helpful in any way?  Such minor frustrations are good practice for the real storms of life and drive me to the truth. God alone is my rock, my salvation and my fortress and in Him I shall not be shaken!  Psalm 65-5. 

Friday, May 17, 2013

Looks are very deceiving!

With the warmer weather I have been working with the garage door open and as it is in small town Minnesota I have had a half dozen folks stop by to visit and see what she looks like.  In one form or another they have all said “looks like you’re about ready to roll”.


Let’s see other than nothing to hold the transmission in, no fuel system, a half rebuilt rear end with no way to mount it, axles and drive shaft that need to be modified, half a cooling system, exhaust suspension and brakes all in pile of parts in the tent and about 50 other issues yeah she’s ready to roll!
 
Even though it may look close with the engine in as you can see the list of things to finish up is staggering. I do feel pretty good about tuning the key on June 15th and having the car respond in some way. Hopefully no fires... However I think it’s very unlikely it will be drivable at that time and any number of things can go wrong to set me back from even having it running by then.
 
So with high hopes and starting V8 Miatas in mind leave you with a Friday funny video.  It is a bit sad and pretty scary, but very funny!   Click me for video
 
PS Our first club race is tomorrow so to my fellow racers in Sioux Falls have a great and safe weekend at the track.  I really wish I could be there but I have a few things to button up on the car first!

Tuesday, May 14, 2013

Open wide Jenna! Miata LS1 installation

It was an exceptional weekend as my youngest graduated from college, mother’s day was celebrated, and the LS went in her new home.

I mentioned in my last post this hole in the head is the wrong size for the gauges going in.
So with drill and tap in hand I went to work.  A trick I picked up from another build thread is to set the air compressor regulator to 20 psi, then plug all the cooling lines and send air into the block. 
 
 It worked like a dream and all the chips blew out on a nice breeze of air as I worked.
Ready to go


These photos pretty much speak for themselves


A pause here to plug in the wires on the back of the engine

Problem here with the bolt I had the chain on. It was hitting the fire wall so I had to relocate the lifiting chain to the side of the head.


Now I had a little hiccup here with the fire wall even with the chain out of the way.  When I test fit the engine the firewall was cut open and pretty floppy.  I did not realize that it had squished in on the passenger side with the head hitting it.  From underneith it looked like it had enough clearance but with it welded the engine was solid against the fire wall and would not bolt in.  I was amazed beyond amazed how strong that fire wall is now that it welded back together.  My 2 lb BH would not move it and my air hammer would not touch it either.  I used an 8 lb sledge hammer and hit it so hard the car was getting tippy on the jack stands to move it.  I feel pretty good about my welds now! 

I won the battle and got it in but it was a ton of work swinging that sledge hammer!  So when you guys test fit your engine don’t get all giddy like I did with it in the bay and miss stuff.  Pay very close attention to the passenger side head clearance and fit the radiator.

OK on with the show..
.
I set the radiator in just to be sure...

The trans took a little wrestling but went right in.  I should have made a little board to fit on the floor jack so it would sit level on it but it was getting late so I just grunted it up in there.
 
I was happy to see the shifter is right where it belongs in the hole.
 
I know it looks like I got a lot done and moved forward a long way but I was only at it about 5 hours over the weekend. In the grand scheme of things if you consider body and paint I think I am about half way done.

Speaking of paint the wheels came and the are the perfect gold/ bronze color to accent the black.  The photo does not do them justice! 
I'm not a big fan of the 8 hole lugs but love everything else about the wheels.  I'll be looking to match or at least tie onto the color for the stripes.

With the celebration of Mothers day I leave you guys with Eph 5 from the message.  Because this is where the rubber meets the road!
 
Husbands, go all out in your love for your wives, exactly as Christ did for the church—a love marked by giving, not getting. Christ’s love makes the church whole. His words evoke her beauty. Everything he does and says is designed to bring the best out of her, dressing her in dazzling white silk, radiant with holiness. And that is how husbands ought to love their wives. They’re really doing themselves a favor—since they’re already “one” in marriage.

No one abuses his own body, does he? No, he feeds and pampers it. That’s how Christ treats us, the church, since we are part of his body. And this is why a man leaves father and mother and cherishes his wife. No longer two, they become “one flesh.”