
The plan for the weekend was to weld up the diff mount and finish the trans
mount but the weather was cruddy and I didn’t want to open the garage door
to weld or lay on the damp floor. As usual there is no shortage of other work so I messed around up front.
I
have been slowly coming to the conclusion that unless I drill a large hole in
the firewall or extend about 100 wires I was not going to be able to have the
PCM inside the car. I knew my corner
brace was going to make it tricky to mount the fuse box and leave no place for the
washer bottle but now I need to find a place for the computer as well.
With
just a little modifying on the PCM it fit nicely between my 2 added braces and
I was able to bolt it to the strut brace. From there I made a bracket to mount the fuse
box to the corner brace and it looks like this.


 But
it’s suppose to be behind the heads on top of the bell housing. In the Camaro there was a nice space there but in
the Miata you
can’t see either from the top or the bottom to know if there is
a gap. I pondered a hole saw in the fire wall for a view but instead pulled the bolts from the
cradle and dropped the engine down about 3 inches to peek in there. Still no real visibility so I went back through
my photos and found the solution. These are old photos from the build to show you.
But
it’s suppose to be behind the heads on top of the bell housing. In the Camaro there was a nice space there but in
the Miata you
can’t see either from the top or the bottom to know if there is
a gap. I pondered a hole saw in the fire wall for a view but instead pulled the bolts from the
cradle and dropped the engine down about 3 inches to peek in there. Still no real visibility so I went back through
my photos and found the solution. These are old photos from the build to show you.
 No room between the passenger side head and the fire wall but if
I route it over the head and then in the valley under the vacuum lines
there is a just enough space to thread the harness through the maze.
No room between the passenger side head and the fire wall but if
I route it over the head and then in the valley under the vacuum lines
there is a just enough space to thread the harness through the maze.
So
I worked it down in there and slowly jacked the cradle back into place. There seems to be some wiggle / slack in the
harness but all I can really do is hope I did not crush it! 
Yes those are 2 large hammers at the right of the photo. There have been many situations in the build that I have needed to induce a tolerance... :-)
 Sorry that is kind of hard to see. Try this


The next bit of adventure took way too long, was way too frustrating, and didn’t turn out very well. Remember I said I did not like the threaded rod on the strut tower brace?


That
led me to my first oops. I tried to
plug in the connectors on the transmission but the wires would not reach. I had the wiring harness laying on top of the
engine
 But
it’s suppose to be behind the heads on top of the bell housing. In the Camaro there was a nice space there but in
the Miata you
can’t see either from the top or the bottom to know if there is
a gap. I pondered a hole saw in the fire wall for a view but instead pulled the bolts from the
cradle and dropped the engine down about 3 inches to peek in there. Still no real visibility so I went back through
my photos and found the solution. These are old photos from the build to show you.
But
it’s suppose to be behind the heads on top of the bell housing. In the Camaro there was a nice space there but in
the Miata you
can’t see either from the top or the bottom to know if there is
a gap. I pondered a hole saw in the fire wall for a view but instead pulled the bolts from the
cradle and dropped the engine down about 3 inches to peek in there. Still no real visibility so I went back through
my photos and found the solution. These are old photos from the build to show you.


Even
though I covered the wire harness and fuel line with heat tape and the
headers are wrapped I was not comfortable with the fuel line running 2 inches
from the header. So I chopped up another
Camaro heat shield and made a shield for them.
 Sorry that is kind of hard to see. Try this
As one thing kept leading to another all weekend it dawned on me that while the cradle was loose it would be a good time to run the
heater hoses. So I pulled the dash, glad
I had not put any screws in it, and put the heater core in.

That
is when I discovered oops #2. When I put
the pedals back in I forgot to put the seal for the steering shaft in plus I
missed one of the studs and bent it.
That took an hour of monkeying around to fix and another half hour to
find the seal…. But now we have heater
hoses through the firewall and the steering shaft seal in.
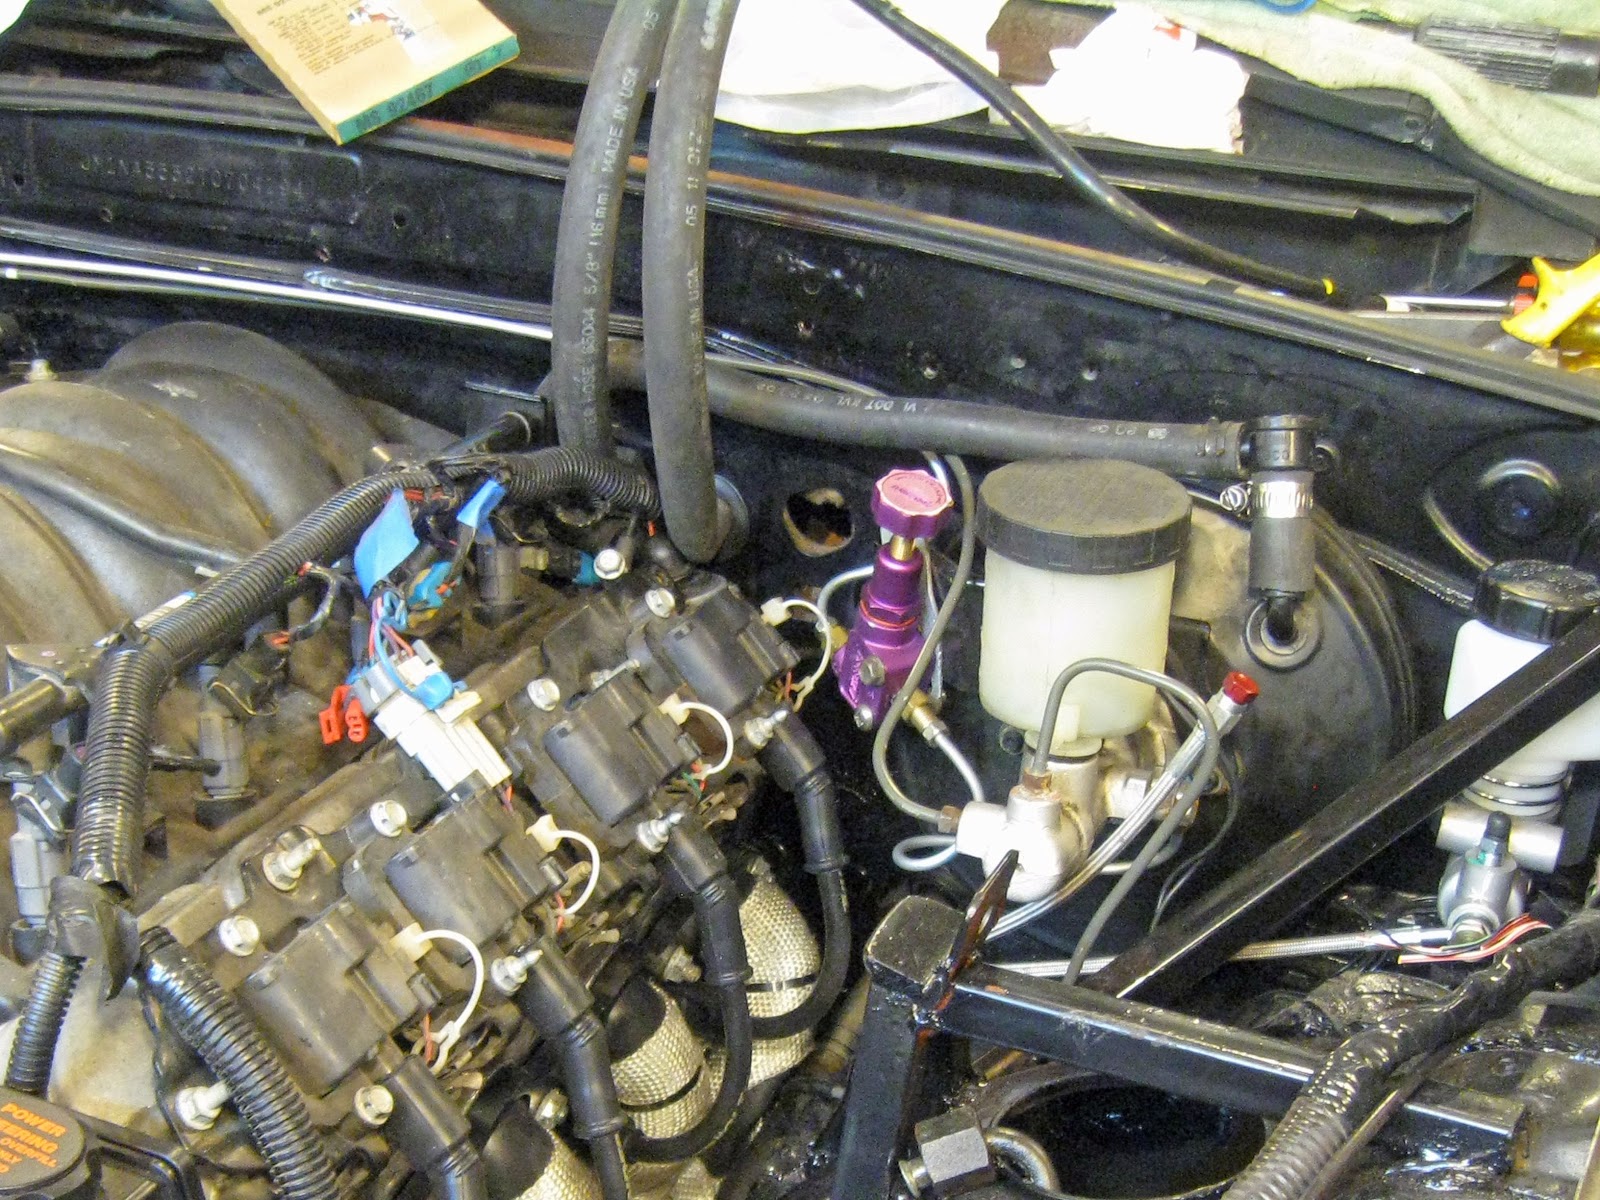
Notice
I also have the vacuum line to the brake booster hooked up now. For those of you trying this at home with an
F body downer if you turn the brake hose around so the booster side is on the manifold
it fits pretty good in the Miata. The
check valve 90 degree fitting is also from the Camaro.
While
in the pedal department I dug up the Miata throttle cable and modified the
Camaro mount to use it. I thought I had a
major show stopping problem when it would not go all the way to wide open throttle
but it was a carpet issue that was quickly resolved. Shew!

No
photos but drilled and tapped a hole in the radiator for the steam vent and I
took an old mouse pad to make some lovely rubber pads for my radiator mounts. I also installed and made covers for my very
sexy new Taylor plug wires.

The next bit of adventure took way too long, was way too frustrating, and didn’t turn out very well. Remember I said I did not like the threaded rod on the strut tower brace?

Well
to make a long story short I fixed it, didn’t like it, cut it apart, grinded for an hour, welded it
up again, got tired of working on it so I just painted it, then I wished I would have installed it one last time before
I painted it! 

It was perfect but warped when I welded the
center under the cut out so it sits about 1/2" higher than it should be and I
had to shim it at the end. I’m not sure I can live with that much gap
between the bar and engine but will see if the hood fits before I pull it apart
again. 

Oops number ?? I
also managed to cross thread one of the end bolts and had to tap it back out. Gurr.
Yes it’s gold but I had to paint it with something and am getting tired
of black! But I am very pleased with the rigidity of the brace and the way it supports the structure. Other than the gap I would not change a thing in my set up.
I
used part of the old Camaro heater hoses to connect to the hoses I put in from
the heater core and finished that up.

I’m
feeling pretty beat down, tired and discouraged after the long weekend and
probably should take a break for a few days.
I got a lot done but not what I planned on and not much if it went smoothly. I love this verse and the thought that the
Lord God creator of all could possibly love me enough to sing over me Zephaniah
3:17 “The Lord your God is in your midst, the mighty one who will save; he will
rejoice over you with gladness; he will quiet you by his love; he will exult
over you with loud singing” How cool is
that! To think the creator of all we
know sings over me with joy. Loudly
even! I still have my doubts if this car
will ever run but there is no question I am loved by God!!
No comments:
Post a Comment